Vanity lighting strips have transformed bathroom and bedroom mirror setups from dim, shadow-casting nightmares into properly lit workstations. Whether someone’s applying makeup, shaving, or just trying to see their reflection clearly, the right lighting makes all the difference. A quality vanity lighting strip delivers even, flicker-free illumination without harsh shadows or color distortion. The market has matured considerably since 2020, with affordable LED options rivaling high-end fixtures and smart-enabled strips offering dimming and color adjustment at the touch of a button. This guide walks through what to look for, where to install it, and how to pick between options without overspending or settling for subpar light.
Table of Contents
ToggleKey Takeaways
- Vanity lighting strips eliminate shadows and provide even illumination for grooming tasks, with LED options offering 25,000 to 50,000 hours of life and 75% better energy efficiency than incandescent bulbs.
- Choose a vanity lighting strip with 4000K to 5000K color temperature and CRI 95+ for accurate skin tone and makeup application without yellowing or harsh distortion.
- Mount vanity lighting strips 12 to 18 inches above the mirror or beside it for optimal light distribution; avoid below-mirror placement that creates unflattering shadows.
- LED strips ($30 to $150) outperform bulb-based vanity lights in flexibility, durability, and ease of DIY installation, with mid-range options ($60 to $150) offering the best value for dimmable, color-adjustable features.
- At least 1000 to 1500 lumens is required for standard 24- to 36-inch mirrors; plug-in strips eliminate electrician costs and suit renters, while hardwired options demand professional installation ($150 to $300 labor).
What Are Vanity Lighting Strips and Why You Need Them
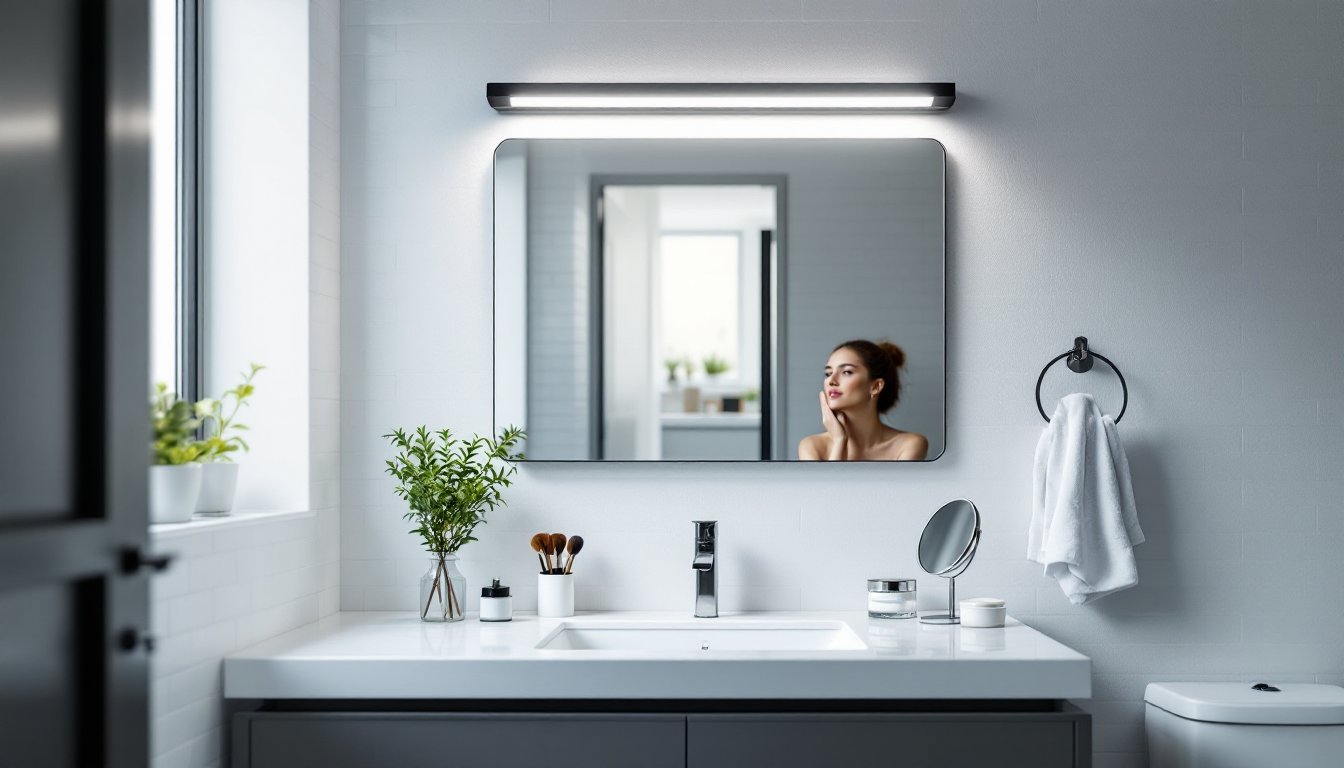
Vanity lighting strips are continuous light sources, typically LED, sometimes incandescent or fluorescent, that mount above, beside, or around mirrors to illuminate a person’s face and the work area below. They differ from standard ceiling fixtures or single sconces because they spread light evenly across the entire mirror surface rather than creating spotlights or shadows.
Most vanity strips use LED technology now because LEDs run cooler, last 25,000 to 50,000 hours, and consume 75% less energy than incandescent bulbs. A typical strip measures 12 to 60 inches and draws between 10 and 40 watts depending on brightness and length. The appeal is straightforward: better light quality for grooming tasks, fewer unflattering shadows, and the ability to see true skin tone and makeup application.
For anyone who’s ever tried applying eyeliner under a single overhead light or struggled to match foundation in a dimly lit bathroom, a vanity strip is a game-changer. It’s especially valuable for anyone with color-critical work, makeup artists, skincare enthusiasts, or detail-oriented shavers benefit immediately. Renters also appreciate plug-in strip options that require no permanent installation.
Key Features to Look For When Choosing Vanity Lighting Strips
Color Temperature and Brightness
Color temperature, measured in Kelvin (K), determines whether light feels warm or cool. Vanity strips typically range from 2700K (warm, yellowish, mimics incandescent) to 5000K or higher (cool, daylight-like). Most makeup artists and grooming tasks favor 4000K to 5000K because it reveals true skin tones without the yellowing effect of 2700K or the harshness of 6500K studio light.
Brightness, measured in lumens, is equally critical. A vanity strip should deliver at least 1000 to 1500 lumens for a standard 24- to 36-inch mirror. Anything below 800 lumens will feel dim for detailed work. Check the lumens per watt (efficacy) when comparing LED options: 100+ lumens per watt indicates efficient, modern LED technology.
Color Rendering Index (CRI), rated 0 to 100, measures how accurately colors appear under that light. Aim for CRI 95 or higher if makeup application, skincare inspection, or color-critical tasks are priorities. A lower CRI makes skin look washed out or misleadingly flattering.
Installation and Flexibility
Vanity strips come in hardwired, plug-in, or battery-powered options. Hardwired strips require running electrical into the wall and a licensed electrician in most jurisdictions, necessary for permanent installations but not ideal for renters. Plug-in strips offer flexibility: they attach to power outlets via a cord. Battery-powered or rechargeable strips work where no outlet is nearby, though they require periodic charging.
Flexibility also refers to physical mounting. Some strips are rigid aluminum bars: others use flexible silicone backing that curves around edges. Dimmable strips allow brightness adjustment via a wall switch, remote, or app. Color-adjustable strips (tunable white or RGB) shift from warm to cool tones or add color effects. These conveniences cost more but offer versatility, warm light for evening relaxation, cool light for detailed morning grooming.
Top Placement Strategies for Optimal Lighting
Above the mirror is the gold standard. Mounting a 24- to 36-inch strip 12 to 18 inches above the mirror frame throws light downward and forward onto the face, minimizing shadows under the eyes, chin, and nose. The horizontal span should match or slightly exceed the mirror width for balanced coverage.
Beside the mirror works well for larger mirrors or when wall space above is limited. Placing vertical strips on either side of the mirror creates soft, wraparound light, studio photographers use this setup. This placement is especially flattering for makeup application because it fills shadows from all angles.
Around the mirror frame (like Hollywood-style vanity lights) distributes light evenly. This approach works for round or decorative mirrors and feels indulgent, though it’s more expensive and requires more installation planning.
Avoid placing strips below or directly behind the mirror: light from below creates unflattering shadows and is less practical. Mount strips at eye level or slightly above (typically 60 to 72 inches from the floor, depending on standing height) to ensure light hits the face, not the floor or lower cabinet.
For small bathrooms, a single above-mirror strip suffices. For larger vanities or dual-sink setups, two strips, one above and one beside, provide professional-grade lighting. Always test placement before permanently mounting: use painter’s tape to simulate the position and assess shadow patterns during morning and evening hours.
Comparing LED Strips vs. Bulb-Based Vanity Lights
LED strips dominate modern vanity lighting because they’re energy-efficient, cool-running, long-lasting, and affordable. A quality LED strip costs $30 to $150 and can last 3 to 5 years with daily use. LEDs produce negligible heat, making them safe to install close to mirrors and drywall. They’re available in dimmable and tunable options at every price point.
Bulb-based vanity lights use replaceable incandescent, halogen, or CFL bulbs in socket fixtures mounted along a bar or frame. Incandescent bulbs emit warm, flattering light (2700K) but consume significant power, generate heat, and last only 1000 hours. Halogen offers brighter, whiter light but runs very hot and carries burn risk. CFLs are efficient but have slower warm-up times and less color accuracy than LED.
Bulb-based setups cost $50 to $200 upfront but require ongoing bulb replacements ($10 to $30 per bulb, every 1 to 2 years). They’re also bulkier and less flexible in terms of dimming or color adjustment without replacing the entire fixture.
For DIY installation, LED strips win. They’re lighter, easier to mount, more versatile, and eliminate the cost and hassle of bulb changes. The only scenario where bulb-based lights remain competitive is if someone prefers classic incandescent warmth and already has an existing bulb-socket vanity light they’re refurbishing.
Budget-Friendly vs. Premium Options
Budget options ($20 to $60) typically include basic LED strips with fixed color temperature (usually 5000K), no dimming, and plug-in power. Brands in this tier often deliver solid lumens and decent CRI (80 to 90), suitable for straightforward grooming tasks. The trade-off is limited customization and sometimes thinner aluminum housings that bend or dent easily.
Mid-range strips ($60 to $150) add dimmable controls, slightly higher CRI (90 to 95), and better build quality. Many include app control, voice compatibility, or tunable white options. This tier offers the best value for most DIYers, reliable performance without premium pricing.
Premium options ($150 to $400+) feature studio-grade CRI (95+), professional-grade dimming systems, color-adjustable RGB capabilities, and robust aluminum or steel construction. These appeal to makeup artists, content creators, or anyone doing color-critical work. They’re also designed to last 5+ years and often include warranties.
When comparing costs, factor in installation labor. A plug-in strip costs nothing to install: a hardwired fixture requires an electrician ($150 to $300 labor, plus code compliance). Over a 5-year lifespan, a mid-range plug-in LED strip often delivers better cost-per-use value than a pricey hardwired fixture. Measure the mirror size, confirm brightness needs, and decide whether dimming or color adjustment justifies the premium. Most people find satisfaction in the $60 to $120 range.

