Under cabinet lighting transforms a kitchen’s functionality and ambiance, but adding an integrated outlet elevates the upgrade from nice-to-have to genuinely useful. Instead of fishing for counter space to plug in a coffee maker, blender, or phone charger, an under cabinet light with a built-in outlet puts power exactly where it’s needed, right above the work surface. This combination addresses a real kitchen pain point: limited counter outlets and poor task lighting. Whether someone is prepping dinner or charging devices during meal prep, having both light and power within reach makes the kitchen feel less cramped and more intentional. The installation isn’t complicated for a DIYer with basic electrical skills, though it does require understanding some wiring fundamentals.
Table of Contents
ToggleKey Takeaways
- Under cabinet lighting with outlet combines task lighting and power in a single fixture, eliminating the need for separate counter outlets and freeing up valuable surface space.
- LED systems (hardwired or plug-in) are the modern standard, offering energy efficiency and dimmable brightness, while plug-in hybrid options provide the fastest installation for renters and DIYers.
- Proper placement, light color temperature (warm white vs. daylight), and circuit capacity are critical design considerations to ensure safety and aesthetic appeal.
- Hardwired under cabinet lighting with integrated outlets requires understanding electrical fundamentals, local building codes, and may need permits, so consulting a licensed electrician is recommended for complex installations.
- Plug-in hybrid models are the lowest-risk entry point for DIYers, while hardwired LED systems deliver a cleaner, more permanent look for intentionally designed kitchens.
What Is Under Cabinet Lighting With An Integrated Outlet?
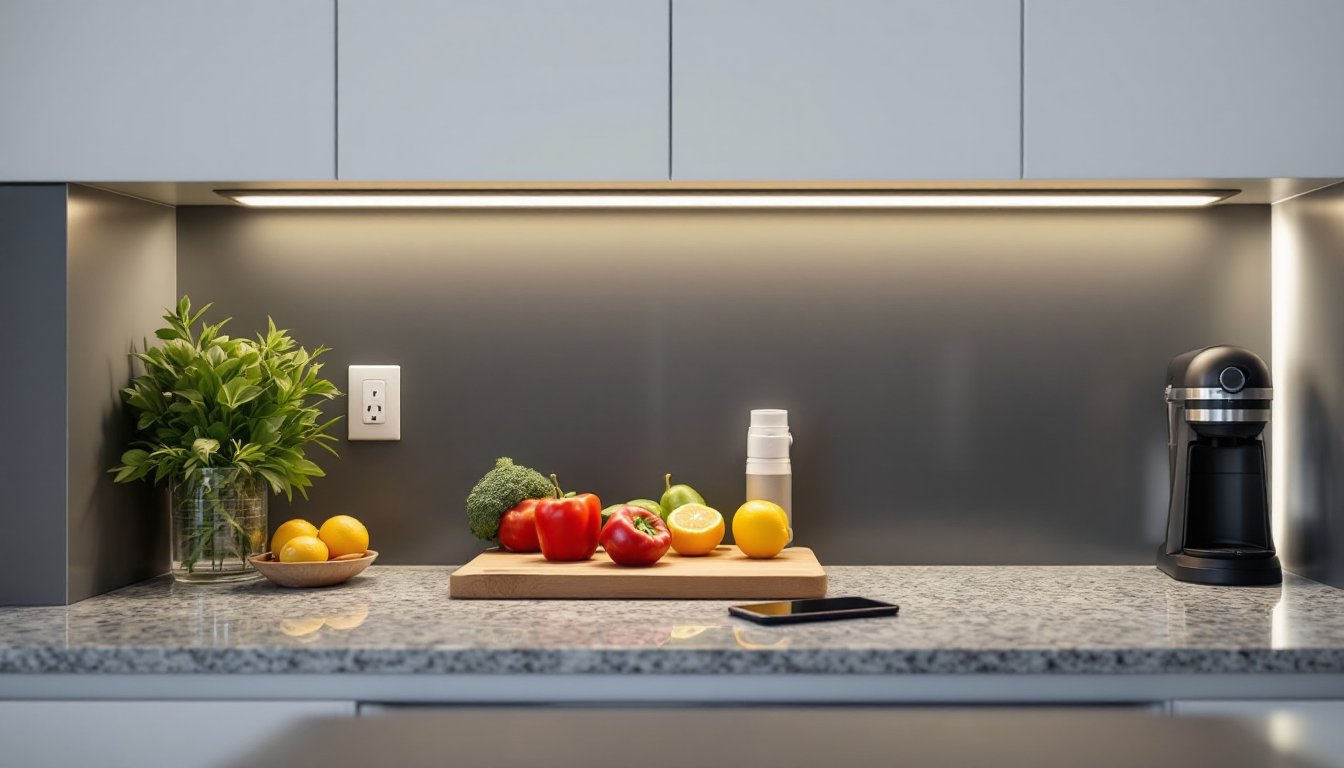
Under cabinet lighting with an integrated outlet is a fixture that combines task lighting and a power receptacle in a single unit mounted underneath kitchen cabinets. The light portion (almost always LED these days) illuminates the countertop below, eliminating shadows and glare. The outlet, typically a standard 15-amp receptacle, sometimes GFCI-protected, is built into the fixture itself, eliminating the need for a separate power source below the counter.
These units come in various forms. Some are compact bars 12 to 48 inches long with a single outlet at one end. Others are modular, allowing users to connect multiple segments and distribute outlets throughout the run. A few premium models include USB charging ports alongside the standard outlet for modern convenience.
The electrical connection runs from either an existing cabinet outlet, a nearby wall outlet (with cord routing), or directly into the kitchen circuit via in-wall wiring. Most units use low-voltage LED systems (12V or 24V) with a transformer, though plug-in models with a standard cord are also available. This distinction matters for installation complexity and code compliance.
Why Add An Outlet To Your Under Cabinet Lights?
A dedicated outlet under cabinets solves two problems at once: poor task lighting and a shortage of convenient counter outlets. Traditional under-cabinet lights are great for visibility, but they don’t address the real estate crunch. A standard kitchen counter already juggles a toaster, coffee maker, and phone charger. Adding another outlet under the cabinet frees up surface space and keeps cords off the visible countertop.
It’s also practical for tools. Anyone who uses a hand mixer, immersion blender, or slow cooker regularly knows the frustration of hunting for an outlet while standing at the prep area. With under cabinet power, there’s no need to reach across the kitchen or run extension cords. For people who charge devices while cooking or working at the counter, having a USB-equipped version under the cabinet keeps cables tidy and out of sight.
From a safety standpoint, an integrated outlet is cleaner than improvising with under-cabinet lights plus a separate cord-run receptacle. It’s a single, code-compliant fixture rather than a Frankenstein setup that raises inspection concerns. And visually, the fixture looks intentional and built-in rather than retrofitted.
Popular Types Of Under Cabinet Lighting With Outlets
LED Systems
LED under-cabinet lights with outlets are the industry standard for new installations. These fixtures use low-voltage LED strips or bars (typically 12V or 24V) powered by a plug-in transformer or hardwired to a dedicated circuit. The light output ranges from 300 to 600 lumens per foot, depending on the model.
Hardwired LED systems offer the cleanest appearance. The fixture is permanently mounted, and the outlet is integrated seamlessly. Installation requires running electrical wire inside the wall or cabinet framing to the transformer location, usually hidden inside an adjacent cabinet or above the existing cabinet line. This approach requires some electrical knowledge and may need a permit depending on local codes.
Pluggable LED systems are simpler for DIYers. The fixture plugs into an existing outlet via a cord, eliminating any hardwiring. The tradeoff: a visible cord that must be routed behind or along the cabinet. These systems are ideal for rentals or temporary setups since they’re non-invasive.
Most LED models include dimmable drivers, allowing users to adjust brightness for different times of day or tasks. Color temperature options range from warm white (2700K) to daylight (5000K), so users can match their kitchen’s existing lighting.
Plug-In Hybrid Options
Plug-in hybrid fixtures blend the convenience of a standard outlet with LED lighting in a compact package. These units come as self-contained bars, usually 12 to 24 inches long, with a single outlet at one end and an LED light running the length of the fixture. A single power cord does the heavy lifting: it supplies electricity to both the light and the outlet.
Hybrid options are the fastest to install, literally unbox, mount with brackets, and plug in. No wiring, no permits, no transformer configuration. They’re perfect for renters, temporary kitchens, or a first attempt before committing to hardwired installation. The drawback is the visible cord and the single point of failure: if the cord is damaged, both the light and outlet go down.
These units are also less expensive upfront than hardwired LED systems. But, they have fewer design options and can’t be extended across longer cabinet runs as easily as modular LED systems.
Installation Tips For Under Cabinet Lighting With Outlets
Before starting, gather: a level, drill/driver, screwdriver set, wire strippers (for hardwired installs), a voltage tester, and safety glasses. For hardwired systems, also have a fish tape and the appropriate circuit breaker access.
First, shut off power to any existing outlets on that circuit at the breaker panel. Test the outlets with a voltage tester to confirm power is off. This step is non-negotiable, don’t skip it.
Measure cabinet undersides carefully. Account for the thickness of the fixture and ensure it won’t interfere with drawers or appliances below. Mark mounting bracket positions with a pencil. Most fixtures require brackets every 24 inches: follow the manufacturer’s spec sheet.
For plug-in models, mounting is straightforward: install brackets with the supplied fasteners, set the fixture in place, and secure it. Route the cord along the back of the cabinet or up and over the side, securing it with adhesive clips or staples (not so tight that you crush the insulation). Plug into an existing outlet that isn’t overloaded.
For hardwired LED systems, the installation is more involved. If running new wire, use Romex (NM cable) rated for the circuit (typically 14-2 for 15-amp circuits, 12-2 for 20-amp). Route it from the breaker panel or a junction box to the fixture location. The transformer and outlet box install inside the cabinet or behind a removable panel. All connections, wire-to-transformer, transformer-to-fixture, fixture-to-outlet box, must be secure and properly covered. Use wire nuts if required, and keep connections away from moisture.
Once the fixture is mounted, test the light and outlet with a lamp or small device. If wiring a dedicated circuit, have a licensed electrician inspect before closing walls or cabinets. Building codes vary by location: some jurisdictions require permits for hardwired kitchen outlets. Check with your local building department before starting.
If the existing cabinet framing is thin or made of particleboard, use hollow-wall anchors or threaded inserts instead of drywall screws. Particleboard strips easily if over-torqued.
Design Considerations Before You Install
Think about the outlet’s placement. If the fixture runs the width of an island or galley wall, position the outlet at an end that’s accessible but not in the main line of sight. Some users prefer the outlet on the side facing the main work zone: others want it tucked at a corner for a cleaner look.
Light color matters more than people expect. Warm white (2700K) complements traditional kitchens and feels cozy. Daylight (4000–5000K) is better for detailed tasks and modern, minimalist spaces. If the kitchen already has recessed or pendant lighting, match the under-cabinet color temperature to them for visual harmony.
Consider overload carefully. A standard 15-amp outlet can handle roughly 1,440 watts on a 20-amp circuit or 1,200 watts on a 15-amp circuit, accounting for safety margins. If the user plans to run a 1,500-watt instant-hot water dispenser, a high-powered blender, and a slow cooker simultaneously, the outlet may trip the circuit. A dedicated 20-amp circuit gives more breathing room, especially in heavily used kitchens.
Cord visibility matters. In open-concept kitchens, a visible black power cord dangling below white cabinets looks rough. If aesthetics are critical, commit to a hardwired system. If a hybrid plug-in model is the choice, select a cord color that matches the cabinet finish (manufacturers offer white and black options for most models).
Finally, confirm cabinet depth. Standard base cabinets are 24 inches deep: the fixture plus the outlet receptacle may require 2–3 inches of vertical clearance below the counter. Shallow or custom cabinetry might not fit standard fixtures, requiring a smaller or narrower unit.
Final Thoughts
Under cabinet lighting with an integrated outlet isn’t a luxury, it’s a smart, practical upgrade that pays off every day. It solves real kitchen workflow problems without breaking the budget or requiring extensive carpentry. For DIYers with basic electrical confidence, a plug-in hybrid model is a low-risk starting point. For a cleaner, more permanent installation, a hardwired LED system is worth the extra effort and planning.
Whichever path is chosen, the payoff is the same: better task lighting, more usable counter space, and a kitchen that feels thoughtfully designed rather than hastily assembled. Start small, measure twice, test for power, and take your time with installation. Your future self will thank you every morning when you’re making coffee under perfectly even light with a power source within arm’s reach.

