A well-lit backyard transforms an ordinary yard into an outdoor living space, one that’s functional after dark and genuinely inviting. Outdoor landscape lighting design isn’t about flooding the property with light: it’s about layering fixtures strategically to highlight plants, define spaces, and create ambiance. Whether adding a few accent lights around a new planting bed or rewiring the entire property for evening entertaining, understanding the fundamentals makes the difference between a project that looks like an afterthought and one that looks professionally installed. This guide covers what works, what doesn’t, and how to plan a lighting scheme that’ll serve your backyard for years.
Table of Contents
ToggleKey Takeaways
- Outdoor landscape lighting design works in three strategic layers—ambient, task, and accent light—rather than flooding your yard with uniform brightness.
- Low-voltage 12V systems are the practical choice for most homeowners because they’re safer to install, simpler to maintain, and don’t require permits or a licensed electrician.
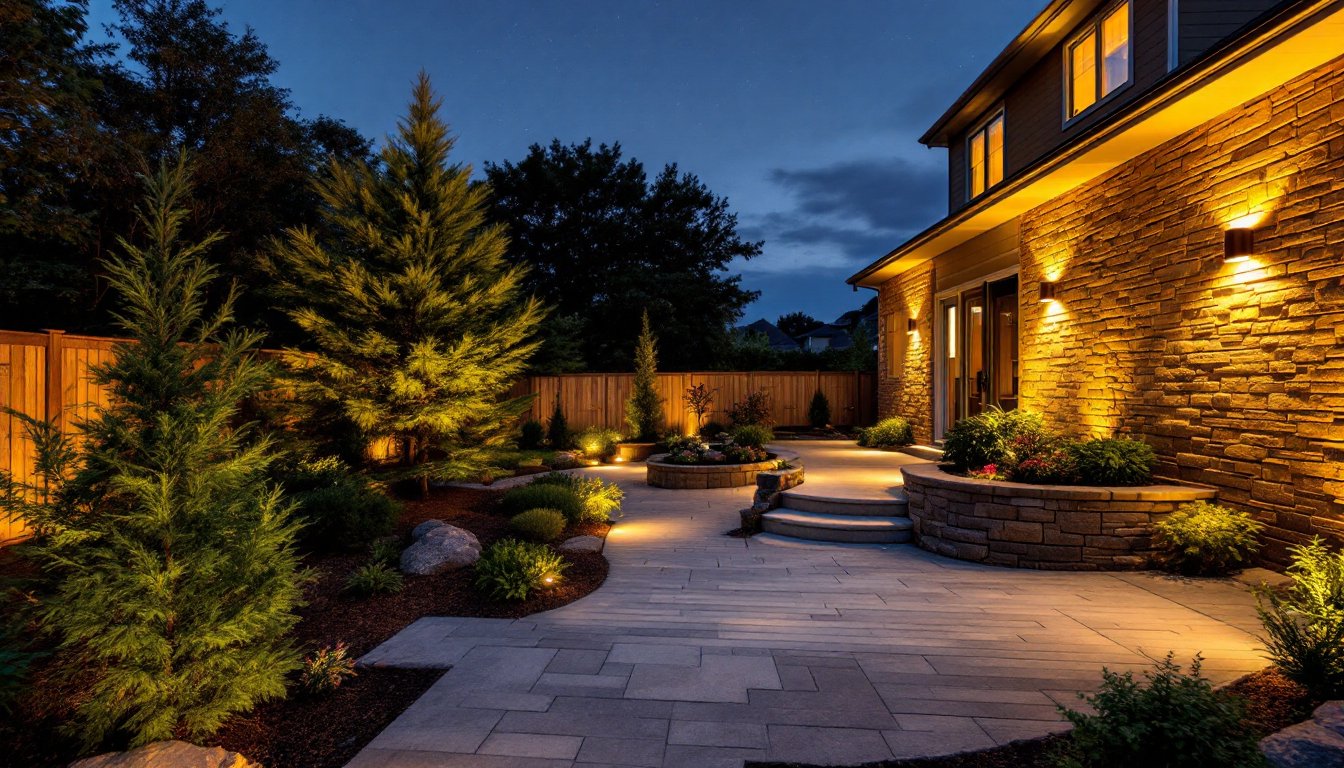
- Use warm 2700K color temperature for trees and plants with moderate beam intensity to enhance texture and create an inviting atmosphere without washing out your landscape features.
- Space pathway lights 4–6 feet apart with 50–100 lumens output for safe navigation, and position task lighting to avoid glare in guests’ eyes using diffusers or frosted lenses.
- LED fixtures save 75–80% energy compared to incandescent bulbs, last 25,000–50,000 hours, and invest in mid-tier aluminum or brass fixtures with glass lenses to avoid rust and yellowing.
- Create a scaled property map marking plants, hardscape, and sightlines before installation, then start simple with your transformer and pathways, adding accent lights incrementally after observing real evening use.
Understanding the Fundamentals of Landscape Lighting
Landscape lighting works in layers. The first layer is ambient light, the general illumination that lets people move safely around the yard and sets the overall mood. The second is task lighting, which puts light where work or activity happens: along a pathway, around a seating area, or near a grill. The third is accent lighting, which highlights specific features like a tree, stone wall, or water element.
Before designing anything, walk your property at dusk and into evening. Notice where shadows fall, which areas feel dark or unsafe, and where your eye naturally settles. That observation tells you what your landscape actually needs rather than what a lighting catalog suggests. Most residential properties benefit from a combination of all three layers: few need the same brightness throughout. Overgeneralized advice to light “everything equally” wastes energy and flattens your landscape’s character.
Voltage matters here. Low-voltage systems (12V) are standard for residential landscape work. They’re safer to install (you won’t need a permit or licensed electrician for most layouts), simpler to troubleshoot, and efficient for long runs of fixtures. Line-voltage (120V or 240V) systems are more powerful and better suited to larger properties or situations where fixtures must be far from the transformer, but they typically require professional installation and a building permit. For most homeowners starting out, low-voltage is the practical choice.
Key Lighting Techniques to Enhance Your Outdoor Space
Accent and Uplighting
Uplighting places a fixture at ground level, angling upward to silhouette or illuminate a plant, tree trunk, or architectural feature. A uplighting fixture on a shrub or small tree creates drama: the same approach on a stone wall or fence recesses the hardscape into shadow, making it feel deeper. Spotlights (narrow beam angle, 15–30 degrees) work well for distant trees, while flood lights (wider beam, 40–60 degrees) suit closer features like textured evergreens or specimen plants.
Warm light (2700K color temperature) complements foliage and stone, while cooler tones (4000K) read more clinical and rarely flatter a residential garden. For trees and plants, warm 2700K is almost always the better call. Keep beam intensity moderate: fixtures that are too bright wash out texture and make features look harsh rather than inviting.
Path and Task Lighting
Path lighting guides feet safely without blinding anyone. Fixtures are typically low to the ground (6–18 inches tall) with wide, gentle spreads of light. Space them 4–6 feet apart along walkways: anything wider and the path becomes a series of isolated pools. A lumen output between 50–100 is sufficient for residential pathways, brighter doesn’t mean better on a garden path.
Task lighting concentrates brightness where work or sitting happens. A deck or patio needs enough light to read or entertain safely, typically 100–200 lumens per square 10×10 feet, depending on whether anyone’s working or simply relaxing. Overhead fixtures (flush mounts or pendant lights) are common on decks: side-wall sconces work for seating areas. The key is positioning: angle lights to avoid glare in seated guests’ eyes, and use fixtures with diffusers or frosted lenses rather than bare bulbs.
Choosing the Right Fixtures and Light Sources
LED is now the standard for landscape lighting, and for good reason. LEDs consume 75–80% less energy than incandescent equivalents, last 25,000–50,000 hours (compared to 1,000–2,000 for incandescent), and generate minimal heat. For a 12V low-voltage system powering a dozen fixtures across the property, the difference in annual energy costs and bulb replacement hassle is real.
Fixture material matters for longevity. Cast aluminum and stainless steel withstand weathering: cheaper stamped-steel fixtures rust quickly, especially in humid or coastal climates. Polycarbonate lenses yellow over time: glass or acrylic lasts longer. If you’re planning to install once and adjust incrementally over years, investing in mid-tier fixtures (brass or aluminum bodies, glass lenses, approximately $30–60 per fixture) pays off versus buying the cheapest option and replacing corroded housings in two seasons.
Color rendering index (CRI) affects how plants and hardscape look. A CRI of 90 or higher reproduces colors more faithfully: anything below 80 can make foliage appear dull or unnatural. For residential accent and path lighting, prioritize CRI 90+ when available, it’s usually only $5–10 more per bulb and dramatically improves how your garden reads in the evening.
Designing a Cohesive Lighting Plan for Your Landscape
Start with a map. Sketch your property to scale, marking existing plants, hardscape, utilities, water features, and sightlines from the house and main seating areas. Mark where you want accent, task, and ambient light, don’t scatter fixtures randomly. Grouping uplights on specimen trees or architectural elements creates intentional focal points: random spotlights read as clutter.
Calculate power and transformer size. A standard low-voltage transformer is 300–600 watts. Multiply each fixture’s wattage (LEDs typically 3–8W per fixture) by the total number of fixtures, then choose a transformer with at least 20% headroom to prevent voltage drop over long wire runs. A run longer than 100 feet may need a larger transformer or a second transformer positioned midway through the circuit.
Plan wire routing carefully. Bury landscape wires 4–6 inches below grade along walkways and planting beds where digging might occur. Above ground, run wires along fence lines or under mulch, marking the path with flags or paint during installation so you remember where they are. A shovel to the wire is inconvenient: better to plan the path once.
Start simple and add incrementally. Install your transformer, pathways, and ambient fixtures first. Live with the system for a season, noting what’s too bright or dark, then add accent lights or adjust placements. Landscape lighting that’s installed in phases feels more intentional because you’re responding to real evening use, not guessing.
Conclusion
Outdoor landscape lighting design is a straightforward skill when you start with a plan. Layer ambient, task, and accent light: choose durable, efficient fixtures: and think long-term about wire routing and transformer capacity. The result is a backyard that functions safely after dark and showcases your landscaping with intention, not excess. Most projects don’t require a licensed electrician, just a clear eye for what your property actually needs and honest assessment of what you’re comfortable installing yourself.

